

Almost anyone can pick up a camera and take a photograph but what is required for that photograph to turn out well? For years I claimed that it didn’t matter which camera you use. I thought that how well a photograph turned out depended entirely on the photographer. This may have a little bit of truth to it. My nan loved taking photographs but many of them were missing people’s heads. If you gave her a modern-day, top-of-the-range camera, I doubt that it would have magically improved her composition. However, on the flip side, I spent years using my Canon EOS 50D (a camera released in 2008) whilst claiming that it still took perfectly good pictures. It wasn’t until I received my Canon EOS 7D Mark II and a nice new Canon lens that I learnt differently.

The temptation when getting any camera is to pop in the battery and start using it without actually reading the manual. Whilst the manual looks long and boring, working through it with your camera in hand can actually pay off when you’re in the field.
When taking photographs of wildlife everything can happen very quickly, such as the action that you don’t expect but that makes the very best photographs. This is why you want to be able to operate your camera without even having to look. It should be second nature; alike to finding your way to work whilst half asleep in the mornings.
For me, getting the Canon EOS 7D Mark II was extremely exciting but also a little daunting. There are a large amount of options within the camera that require exploration. The majority of my life as a keen wildlife photographer has been during the film age so the introduction of multiple menus has significantly changed the way that I view photography.
When using the new Canon camera, there were several things that jumped out at me. For starters the quality was exceptional. One of my first tests of it was at (RSPB) Bempton Cliffs in the East Riding of Yorkshire at around 5am when we were promised sun but found only thick fog. I wasn’t completely familiar with the camera by that point and yet still got shots that had me marvelling at how sharp this camera and lens combo could be.
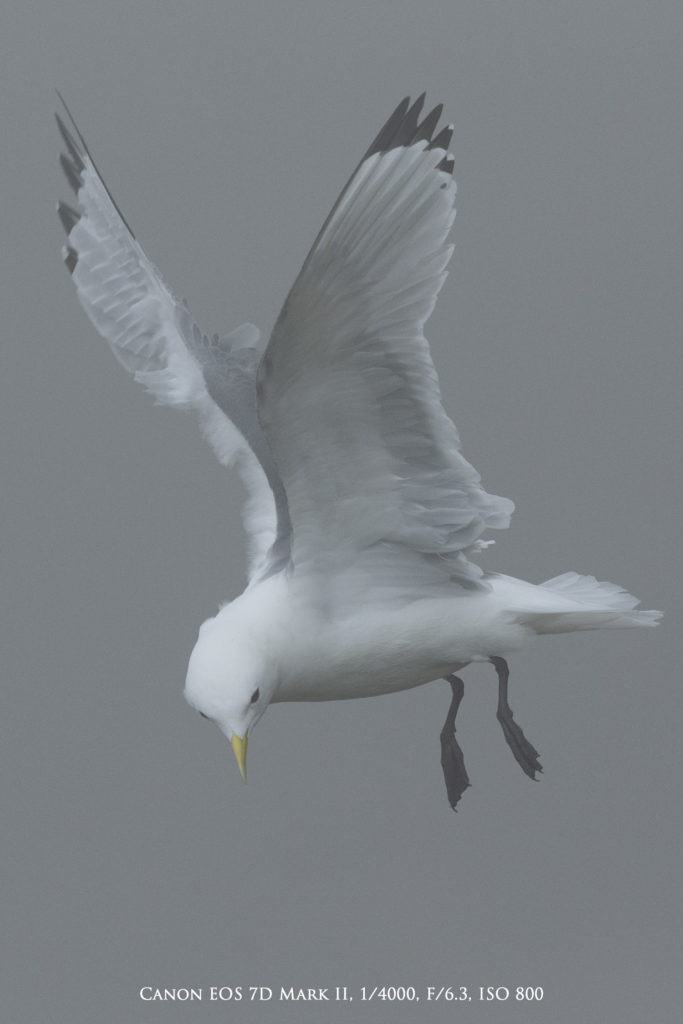
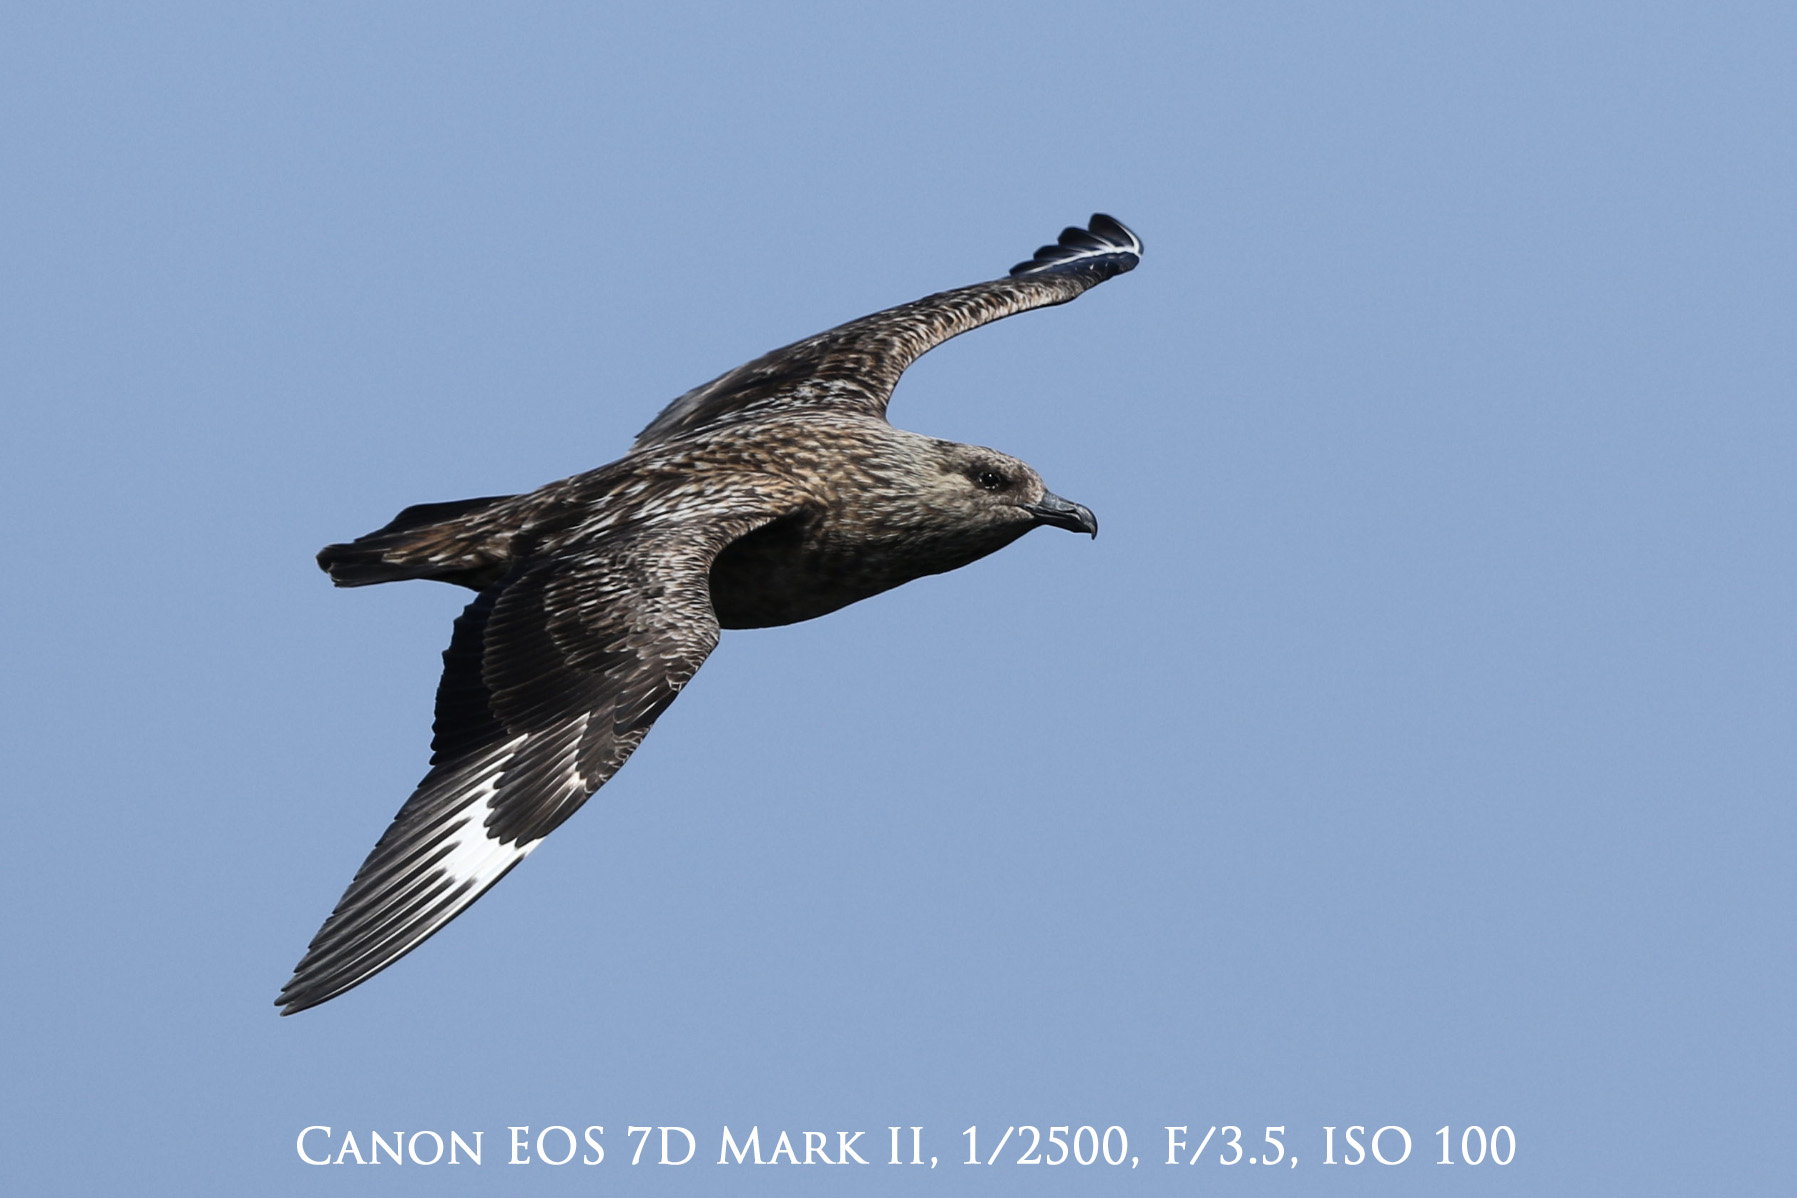
The autofocus on modern-day cameras is there to make your life so much easier. The Canon EOS 7D Mark II has 65 autofocus points, which contrasts heavily with the Canon EOS 50D, which has just 9; a huge benefit for any photographer that has been achieved in just 6 years.
With technology advancing so fast, the average mobile phone can produce an impressive photograph, so when it comes to digital SLRs, the changes feel even more significant. When photographing birds in flight, for instance, the autofocus points and the use of AI servo really proves its worth. By keeping your finger on the autofocus button when following a bird or animal, the focus points follow the movement, which from my experience, allows you to come home with a memory card full of mostly sharp images.
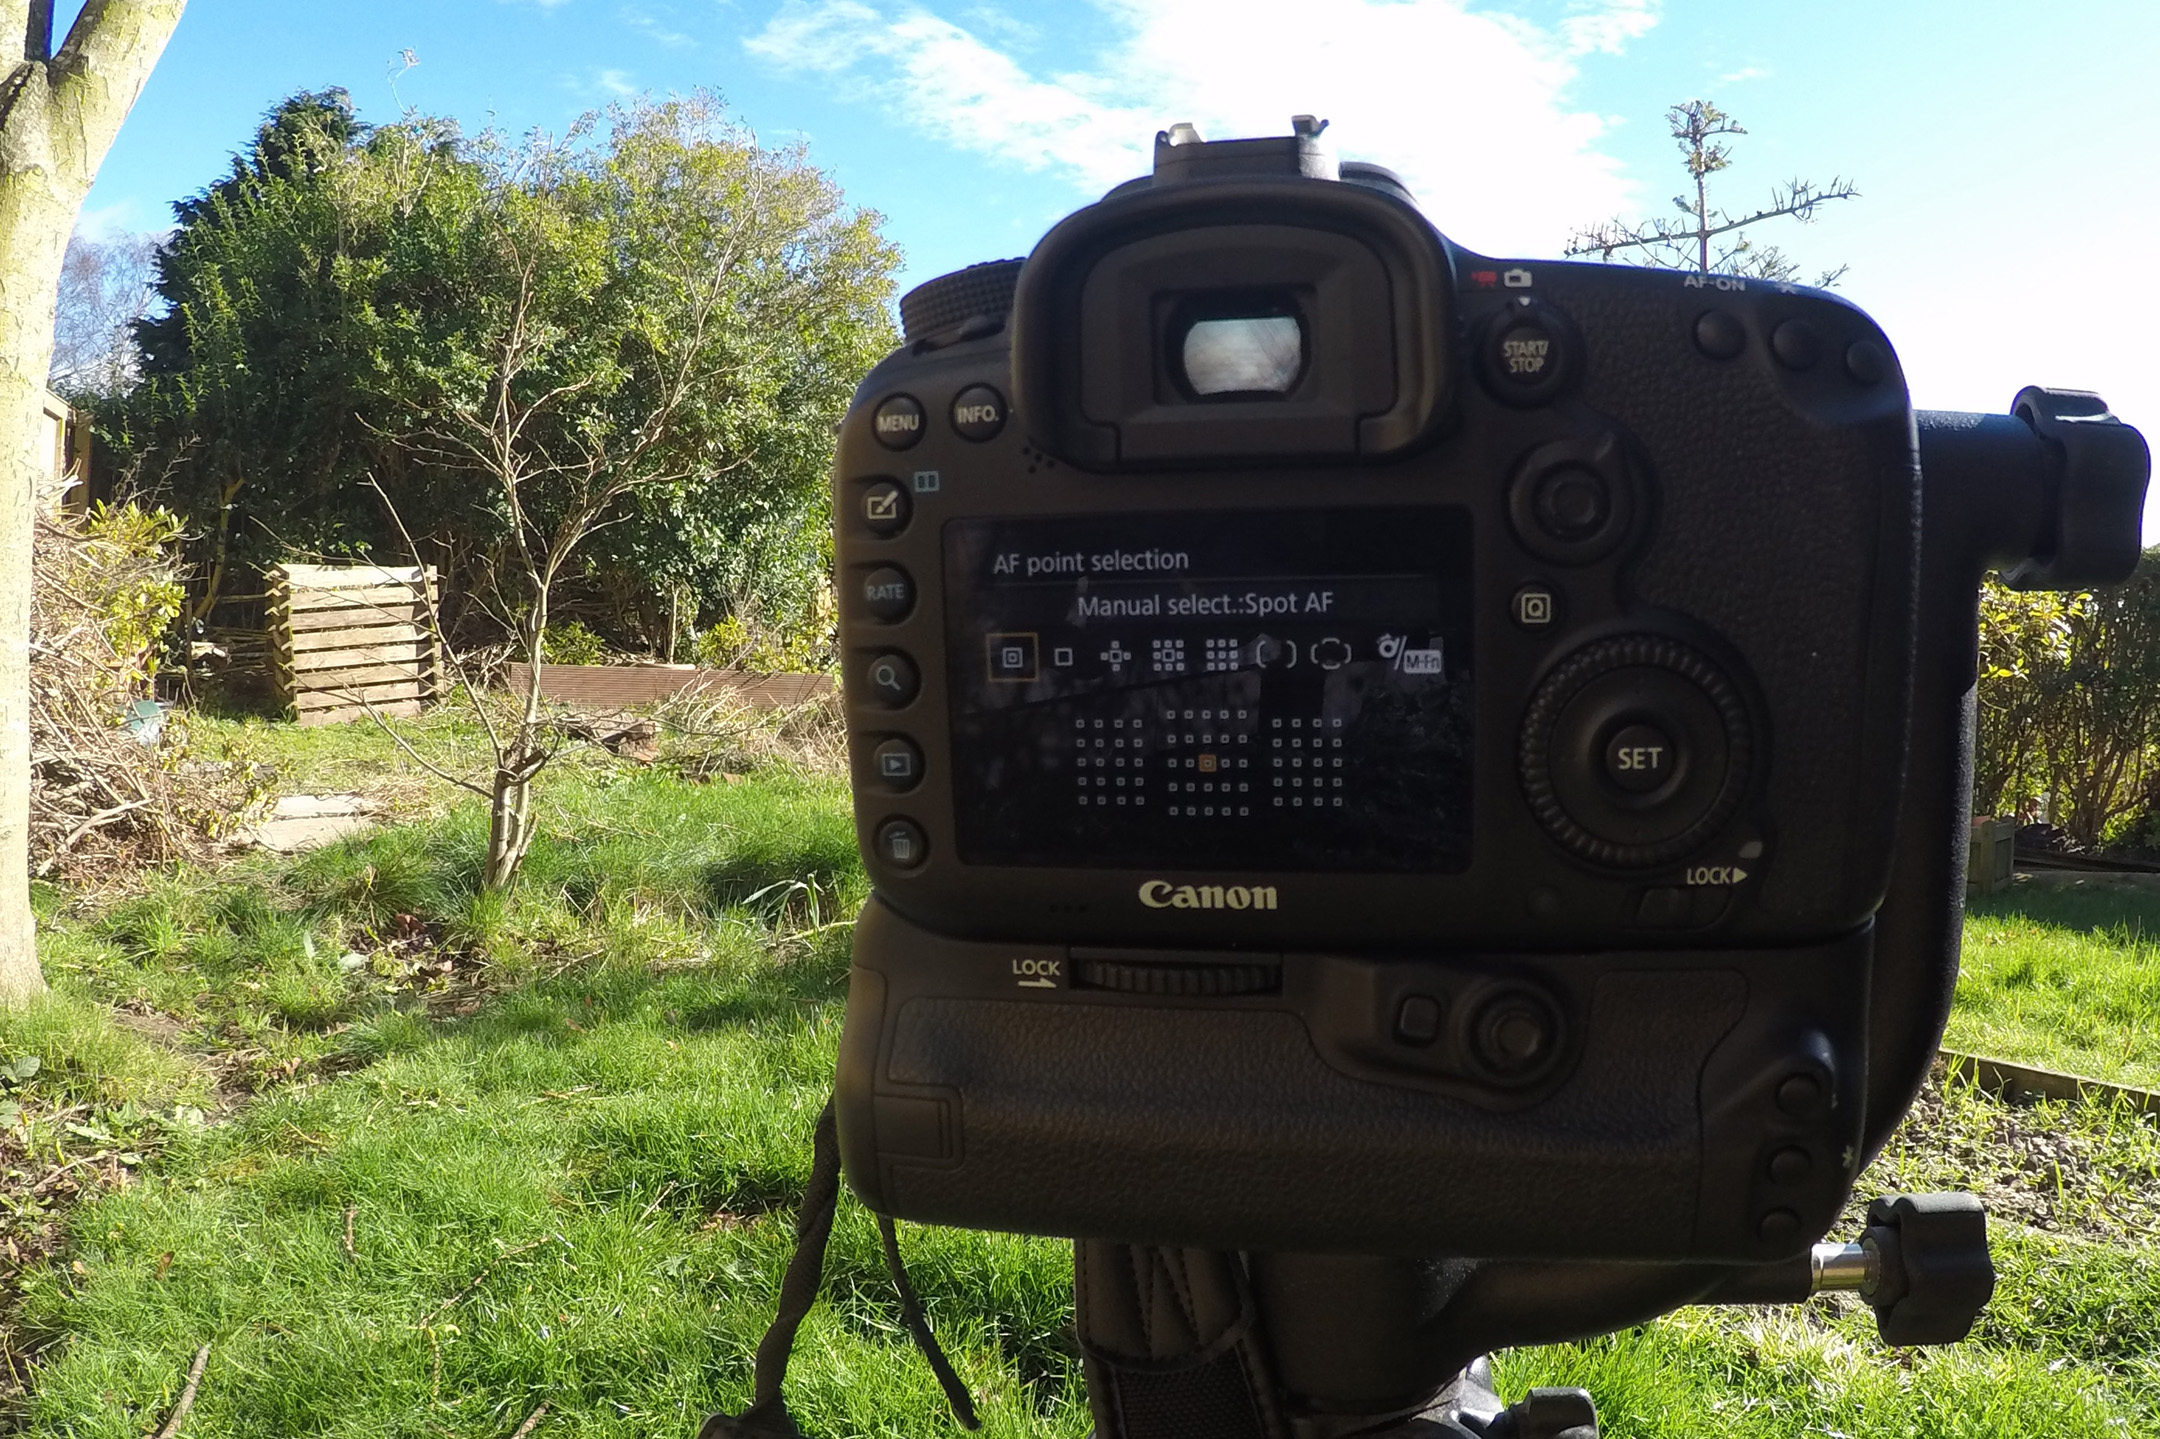

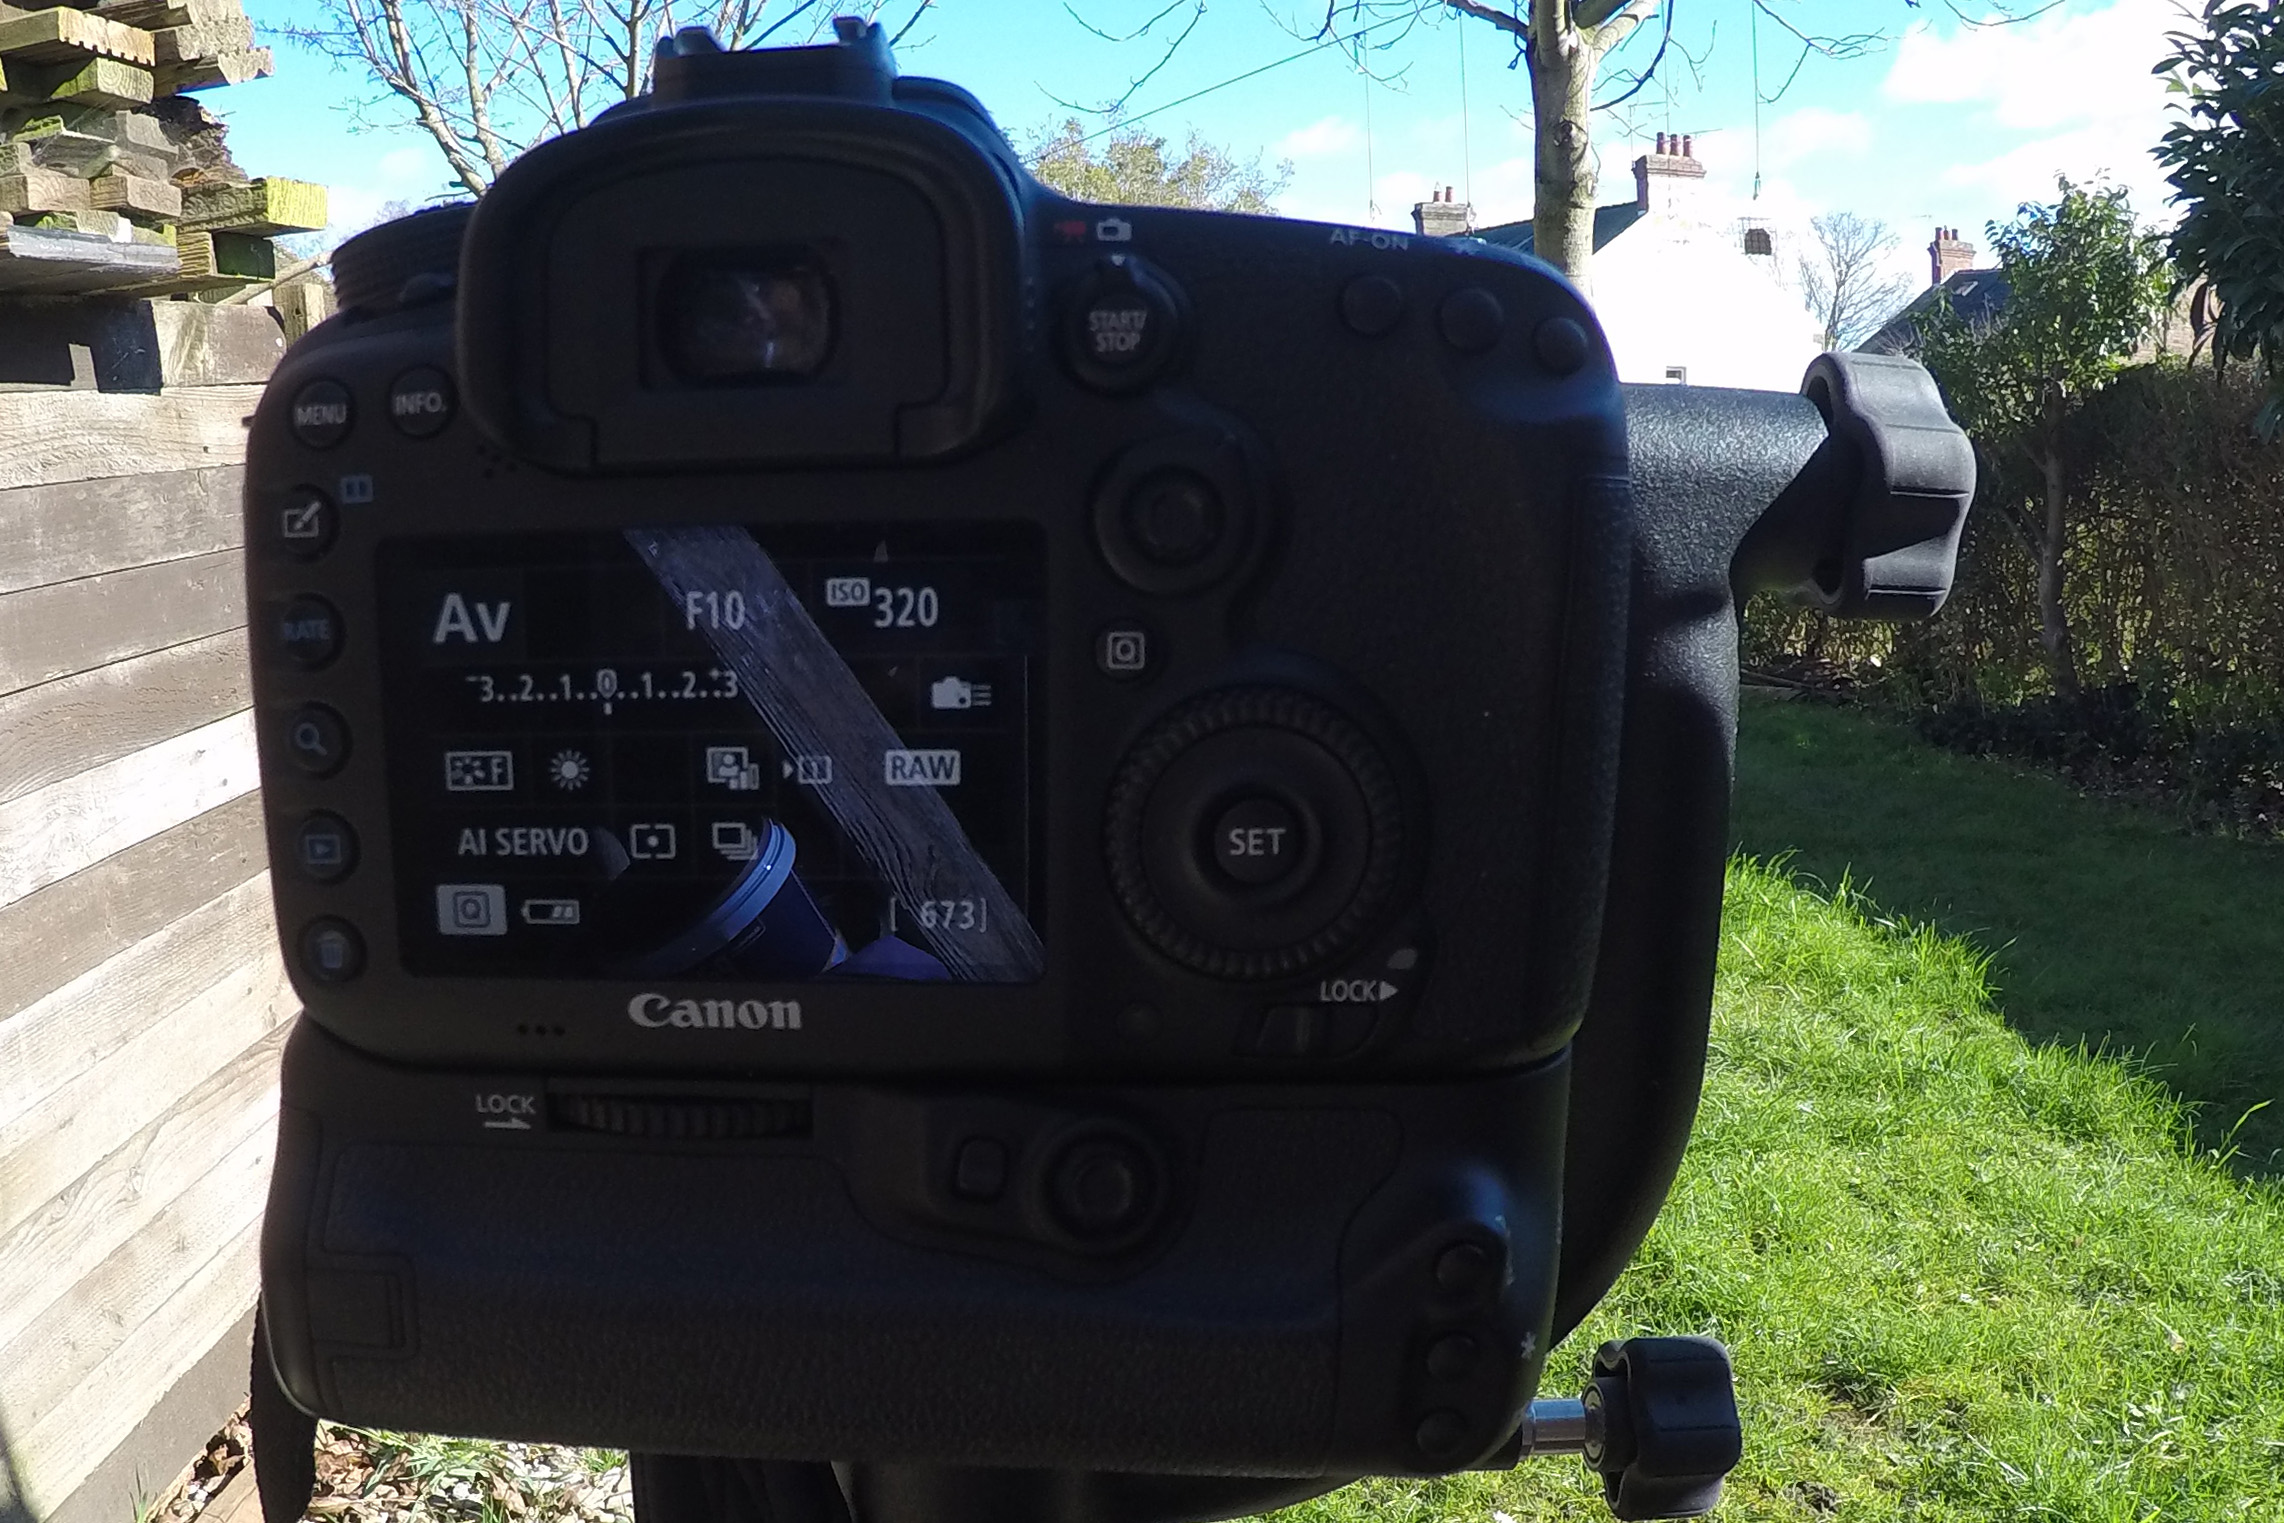
Before taking the camera out to photograph a particular subject, I use the ‘Q’ button to select each of the relevant options for shutter speed, aperture, white balance, ISO etc, though of course these may need to change throughout a particular photography session. This is where the quick function buttons come in useful. On the Canon EOS 7D Mark II there are buttons close to the shutter for white balance, auto focus options and the ISO. The AF point selection and ‘M-Fn’ buttons are within easy reach, which helps you to efficiently change the autofocus point you are using.
Many cameras will allow you to disable the autofocus on the shutter release (when pressing it halfway) and use another button instead. I use ‘AF-ON’ and what a difference it makes! It puts an end to those crucial moments when you’re trying to take a photograph but the camera is busy re-focussing on the wrong thing. The subject no longer runs or flies away whilst the autofocus zooms in and out repeatedly with the user rendered incapable of taking a photograph unless they switch the lens to manual. You can set this up on a Canon EOS 7D Mark II camera by entering the 3rd tab in the orange menu and choosing ‘custom controls’. This allows you to change the functions of various buttons on the camera. You’re likely to find a similar option on a variety of cameras.

One of the biggest benefits to a later Canon model is reliability. Canon have intentionally made their cameras more dust and water resistant and I can definitely tell the difference. In 2015 I visited St Kilda, Scotland. Towards the end of the visit, the boat tours the stacs within the archipelago where thousands of seabirds breed each year. We had a few rainy days during our stay. I chose to protect my Canon 50D with a plastic camera cover. Condensation built, which resulted in the camera becoming unable to determine exposure. I tried switching to manual settings though this didn’t work and presented more challenges. I was trying to hold steady on the swaying boat surrounded with flying birds combined with dark grey rock and white cloud as their background, without any aid from the camera. I was heartbroken that within this incredible wildlife experience, my camera decided to break.
When I returned to St Kilda in 2016, I had my weather resistant Canon EOS 7D Mark II. The difference was phenomenal. No more unsolvable exposure issues, the images were sharp and I could capture behaviour I struggled to get before. The AF points and AI servo meant most of the images were in focus and all the hard work the camera did meant I could concentrate on holding steady and finding interesting shots whilst enjoying the moment.

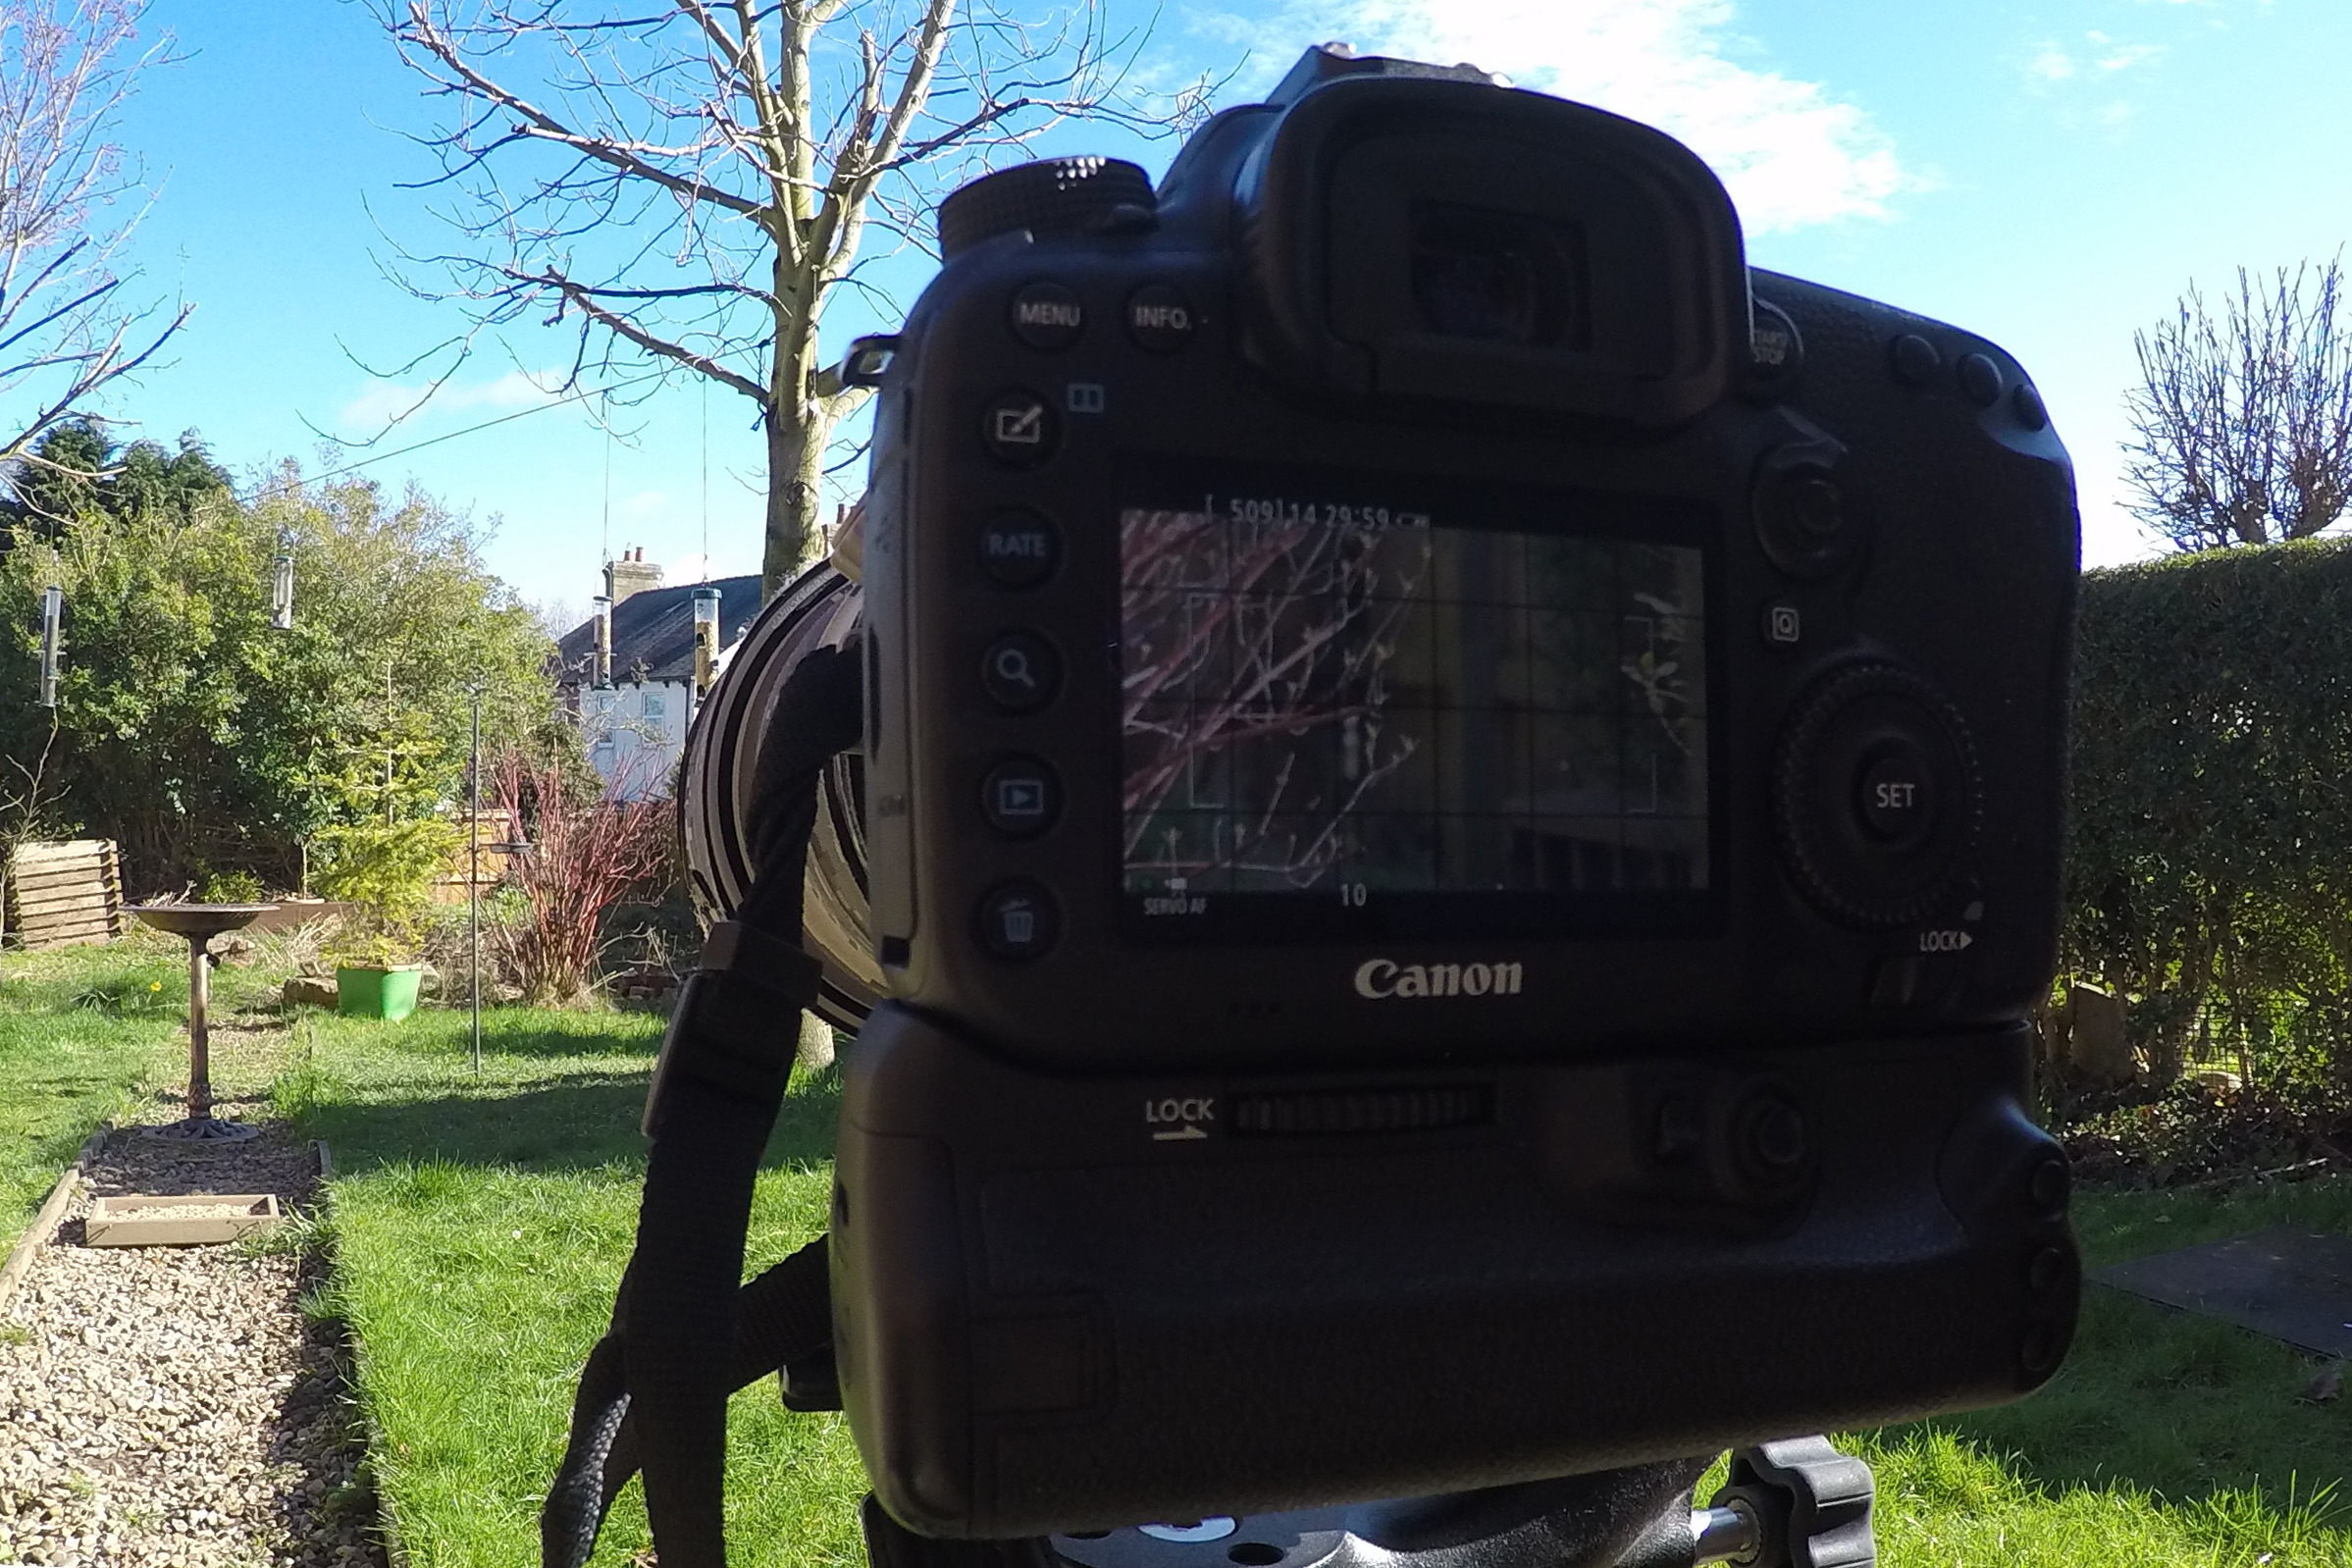
It’s easy to get lost in the moment when photographing a subject, so even after years of experience, it’s still possible to make a mess of that pesky horizon. I have heard photographers suggest that you check all 4 corners of a shot before pressing the shutter so that you know the frame only contains what you want it to contain. It’s not a bad piece of advice although when snapping away quickly during fleeting action, it can be difficult to multi-task. The only way to get good at it is practice. There is another feature in many cameras that can help combat the horizon issue though. In the same way that builders would use a level to make sure that their work is even and, well, level, many cameras have an in-built level that you can choose to activate within your viewfinder.
With the Canon EOS 7D Mark II, you would locate this in the 2nd yellow menu, under ‘Viewfinder Display’. By selecting ‘Viewfinder Level’ (show), you will then see a level within the viewfinder that has a series of black boxes indicating when the camera is crooked. The aim is to have just one single black box in the middle. If you get used to how and when to use this, you may never have to suffer with a crooked horizon again!
The Video Option
Still wildlife photography has always been my passion but when I saw that my Canon EOS 7D Mark II would have the option to film, I was delighted as it would give me a whole new perspective on wildlife encounters. The beauty of using a SLR camera to film is that you are still just carrying around a relatively light camera. I added a microphone to my kit and was ready to go.
Using a filming option on your camera can open the door to a whole new aspect of capturing wildlife with your digital SLR
There are times now when I have lost the light for photography and so choose to film instead. I have found that the footage looks good and professional in some cases; allowing you to easily load the video onto the computer and create a wildlife documentary of your own.
Sometimes you may find that you’re filming and the image you’re shooting would actually make a great still photograph. Canon have already thought this through. It’s possible to film and take photographs at the same time by pressing the shutter fully whilst filming. The film will temporarily freeze whilst the photograph is taken.
Having an external microphone is a great help. The internal microphone is quite good but not exceptional if you’re looking to have great sound accompanying your images. A ‘deadcat’ reduces the impact of the wind and microphones alike to ours have an option to reduce unwanted background noise further than the standard setting.
Updating Your Equipment
We have discussed a range of equipment in this blog entry. Many of the features we have talked about are relevant to a variety of camera models but we have primarily focussed on the Canon EOS 7D Mark II.
Changing to a newer model of camera can be a daunting prospect and so it’s important that before you buy, you make sure that it’s the right camera for you. We have found the Canon EOS 7D Mark II exceptional for wildlife photography, however there are newer models becoming available on a regular basis.

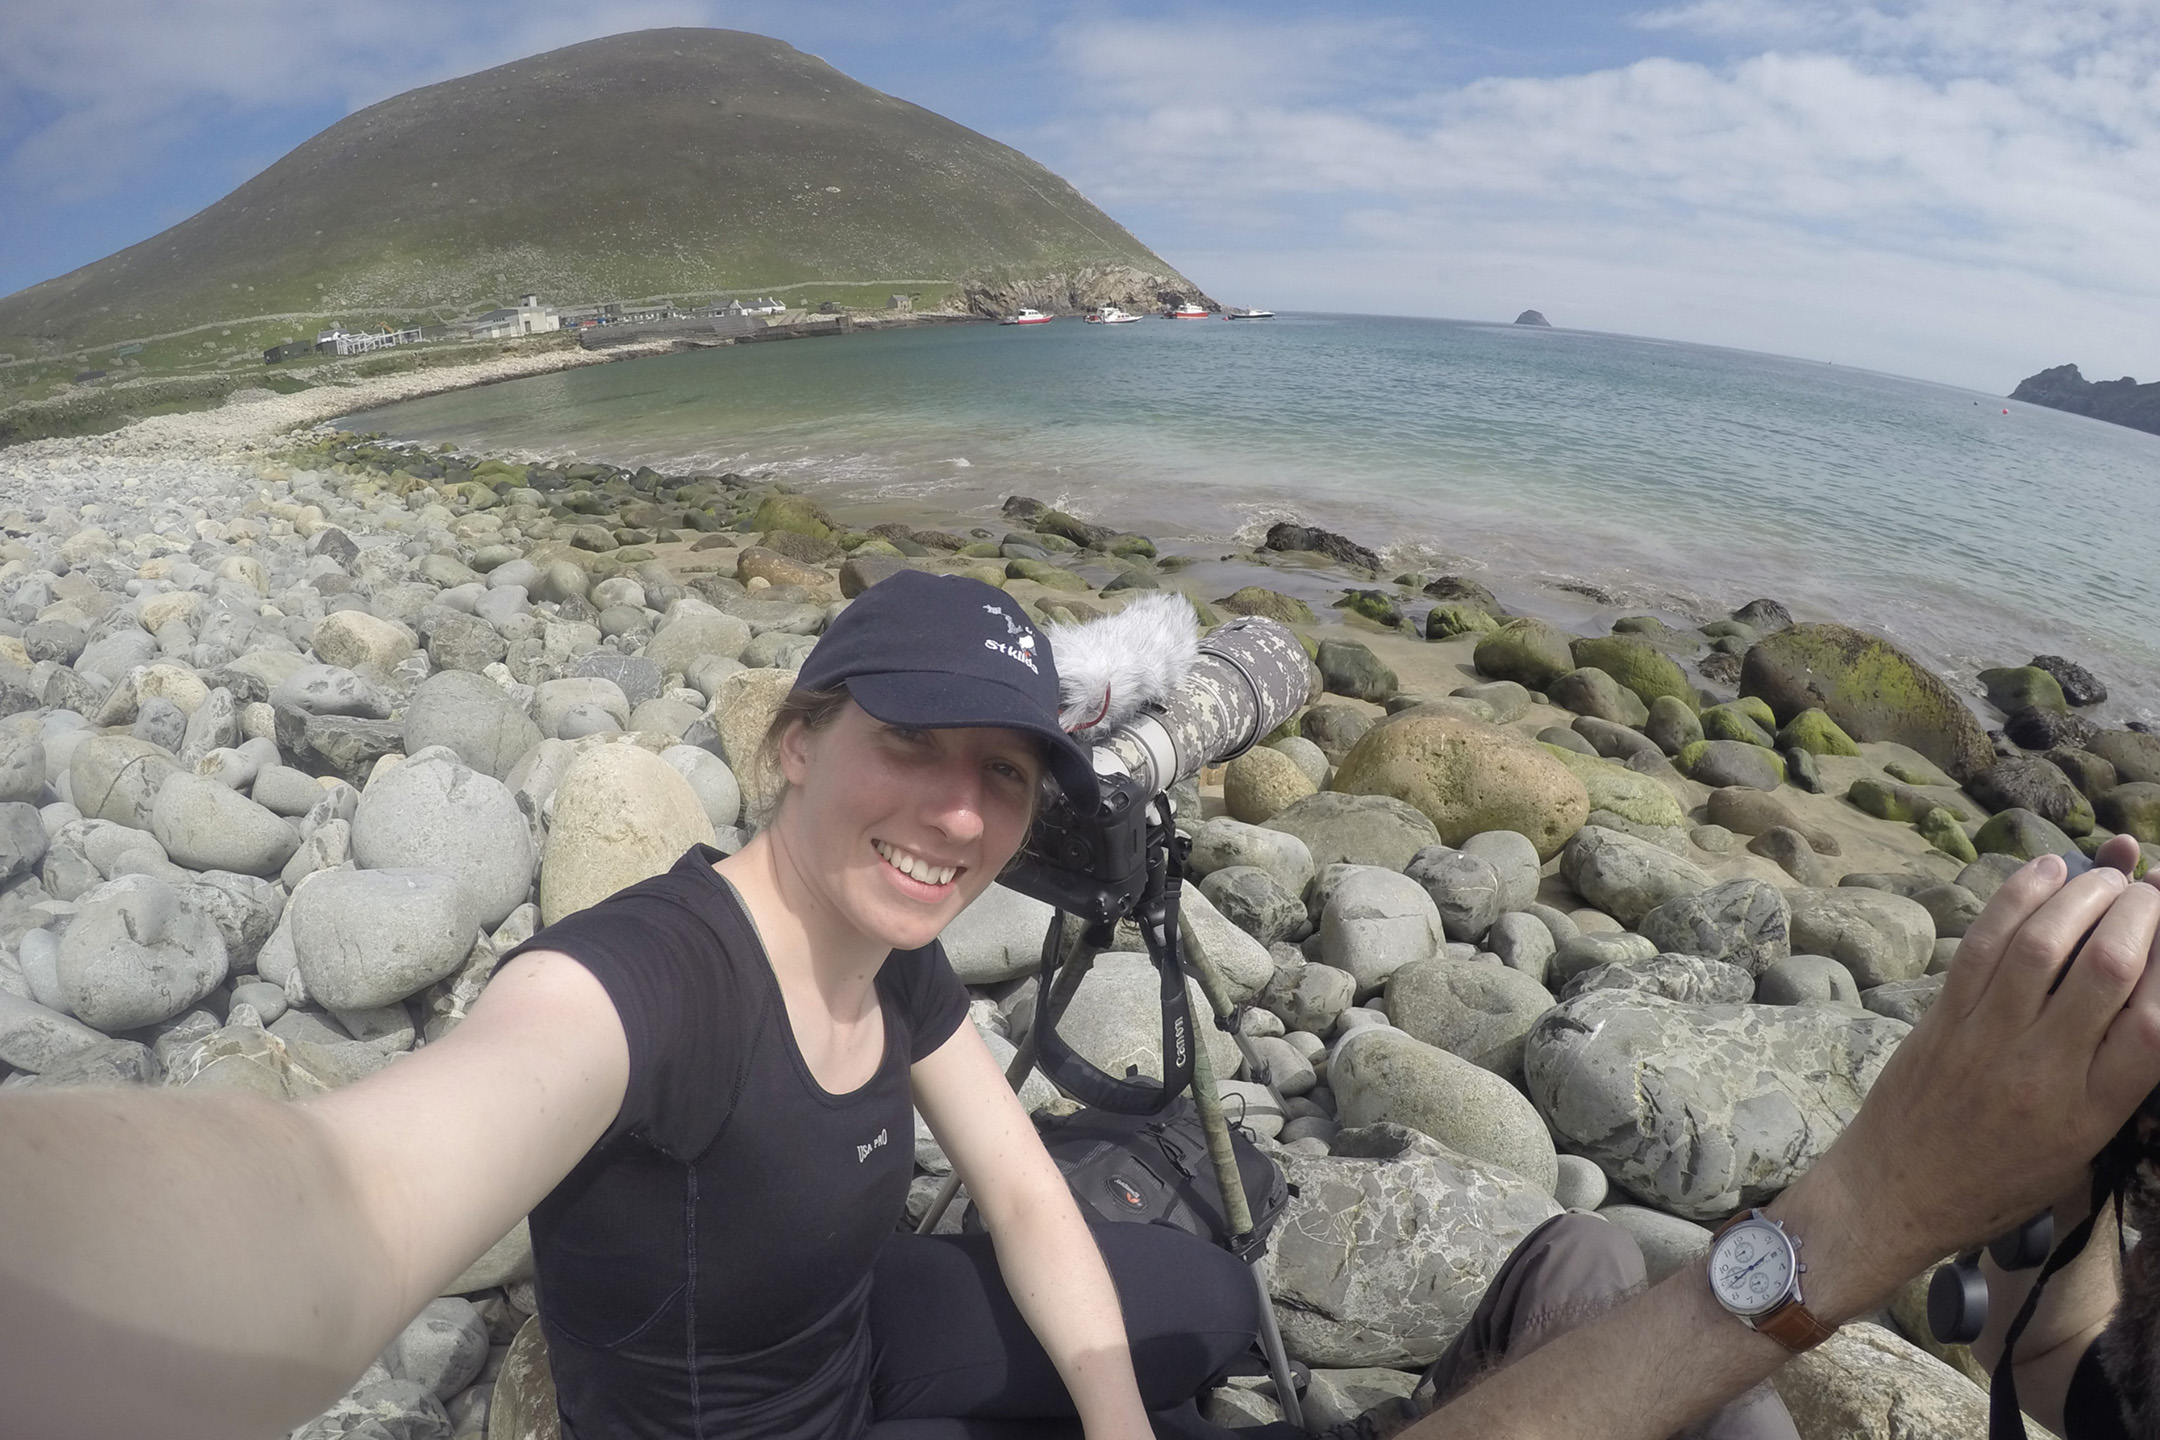
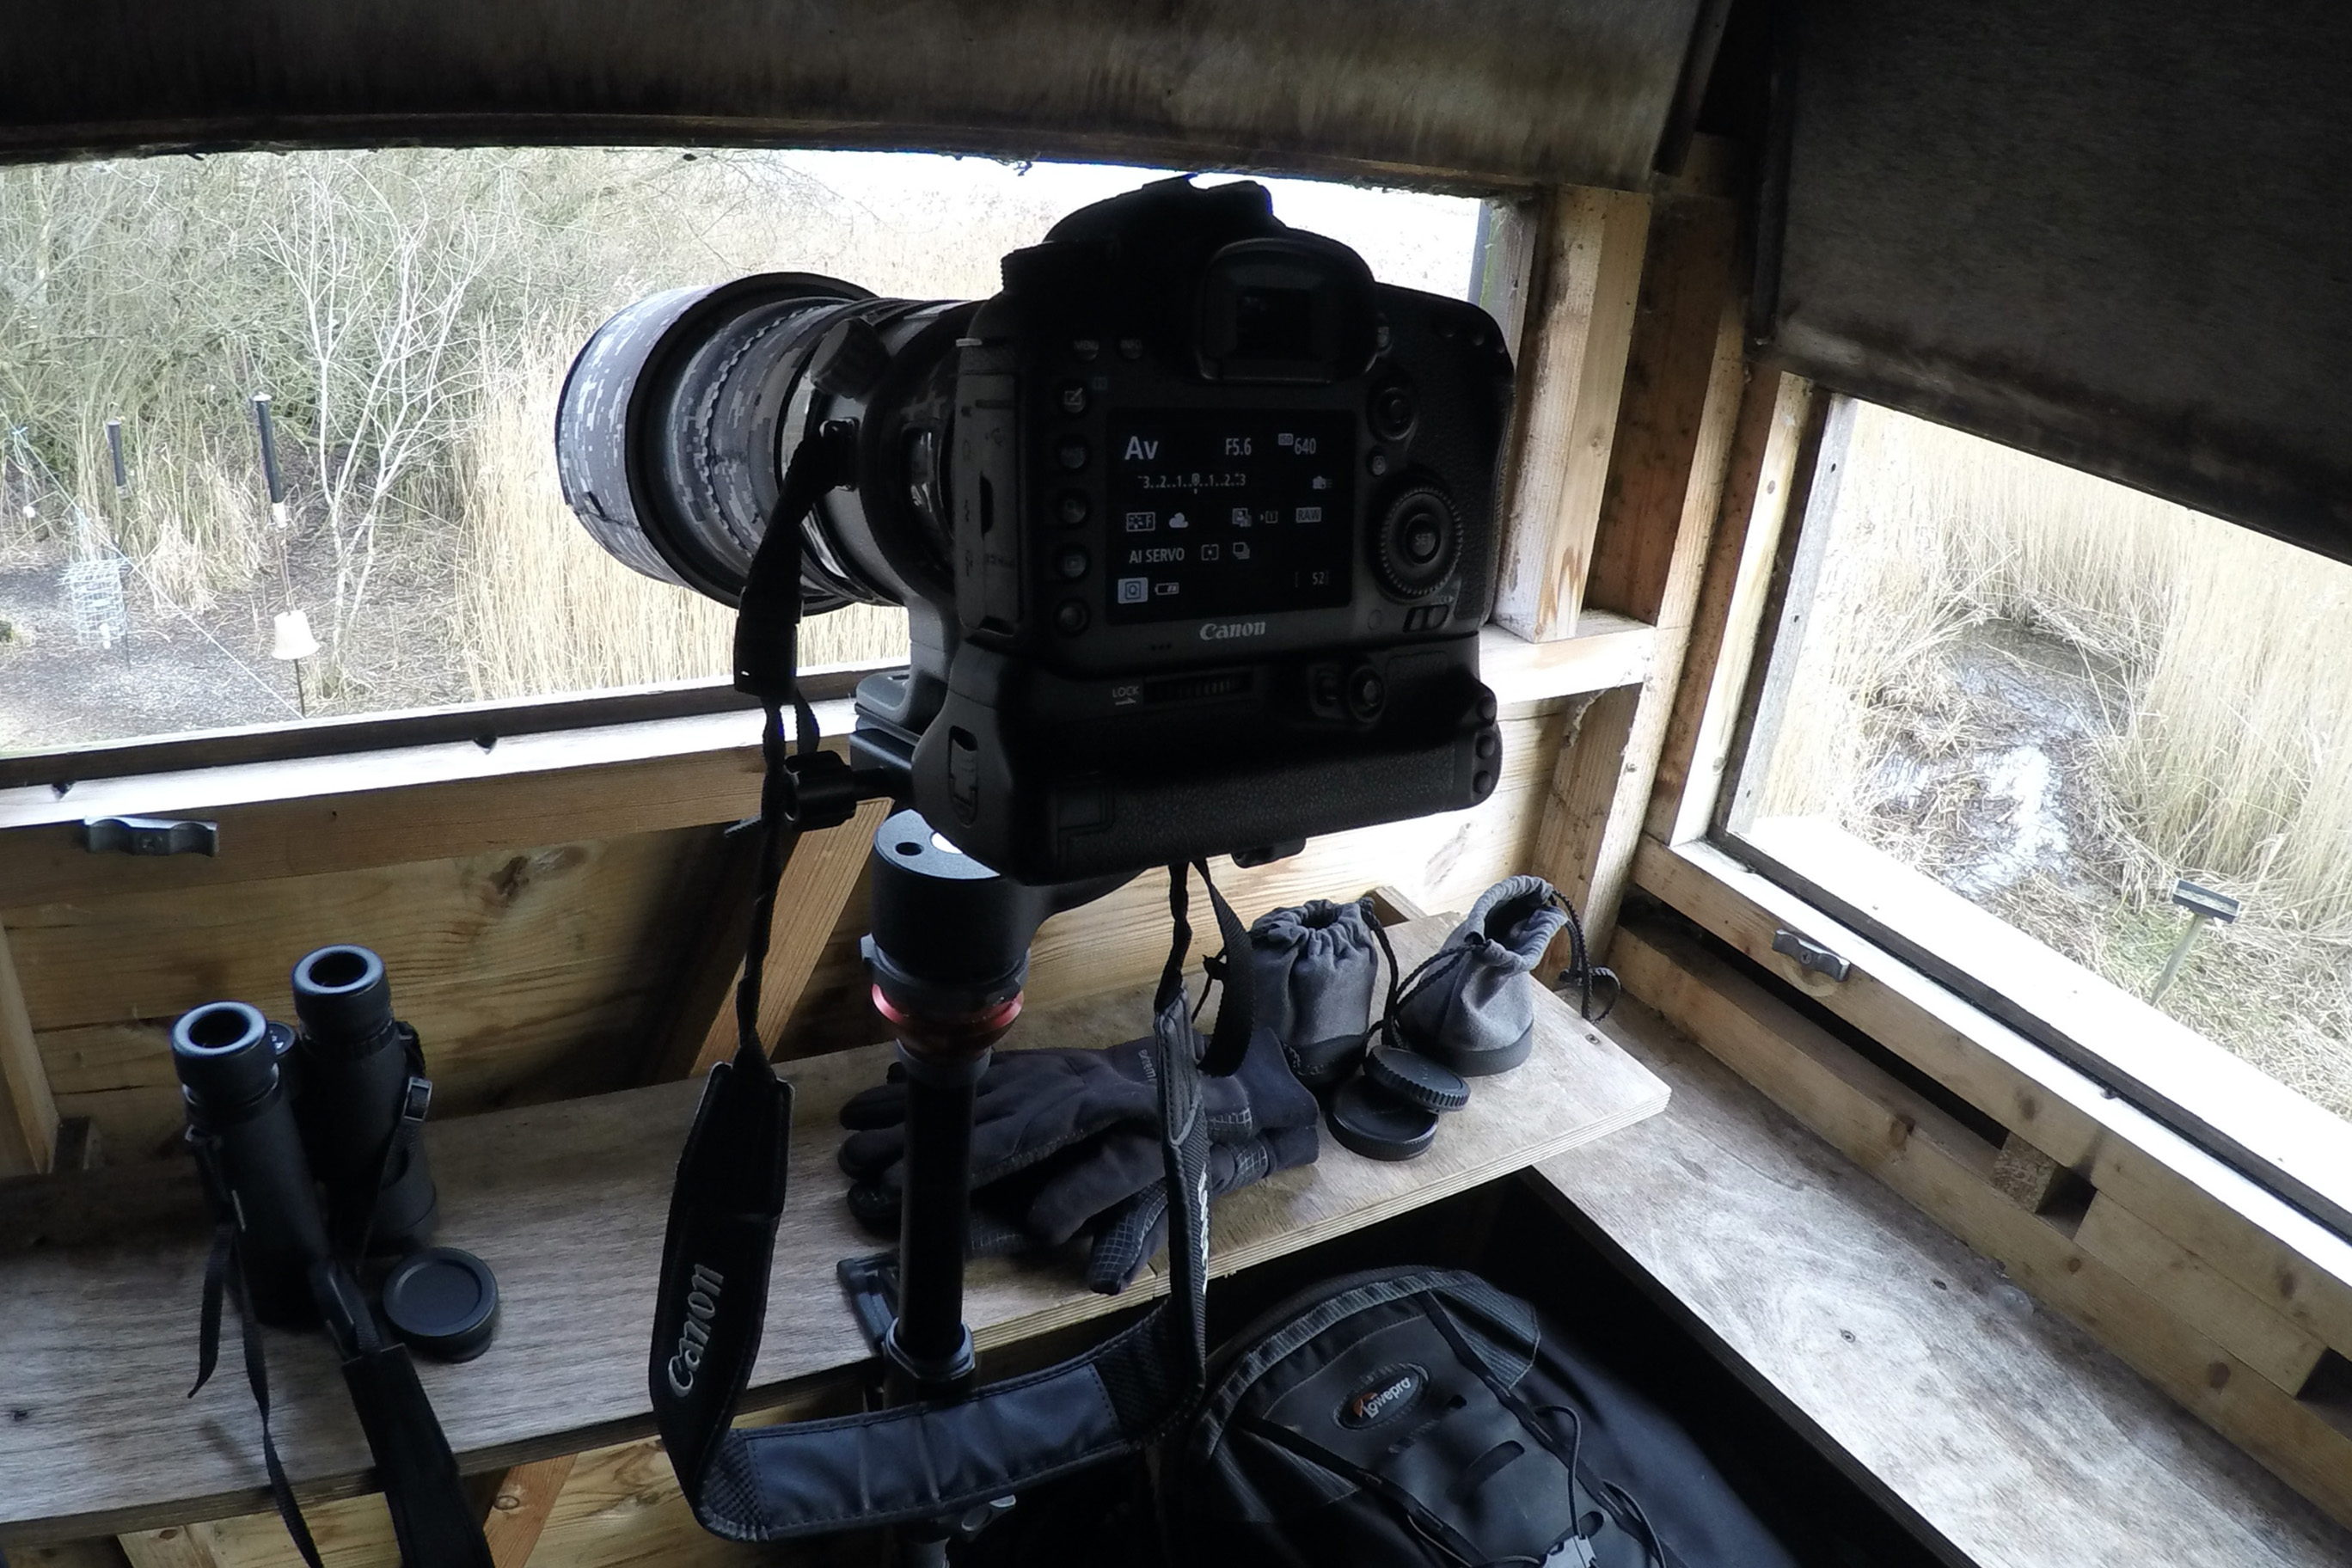
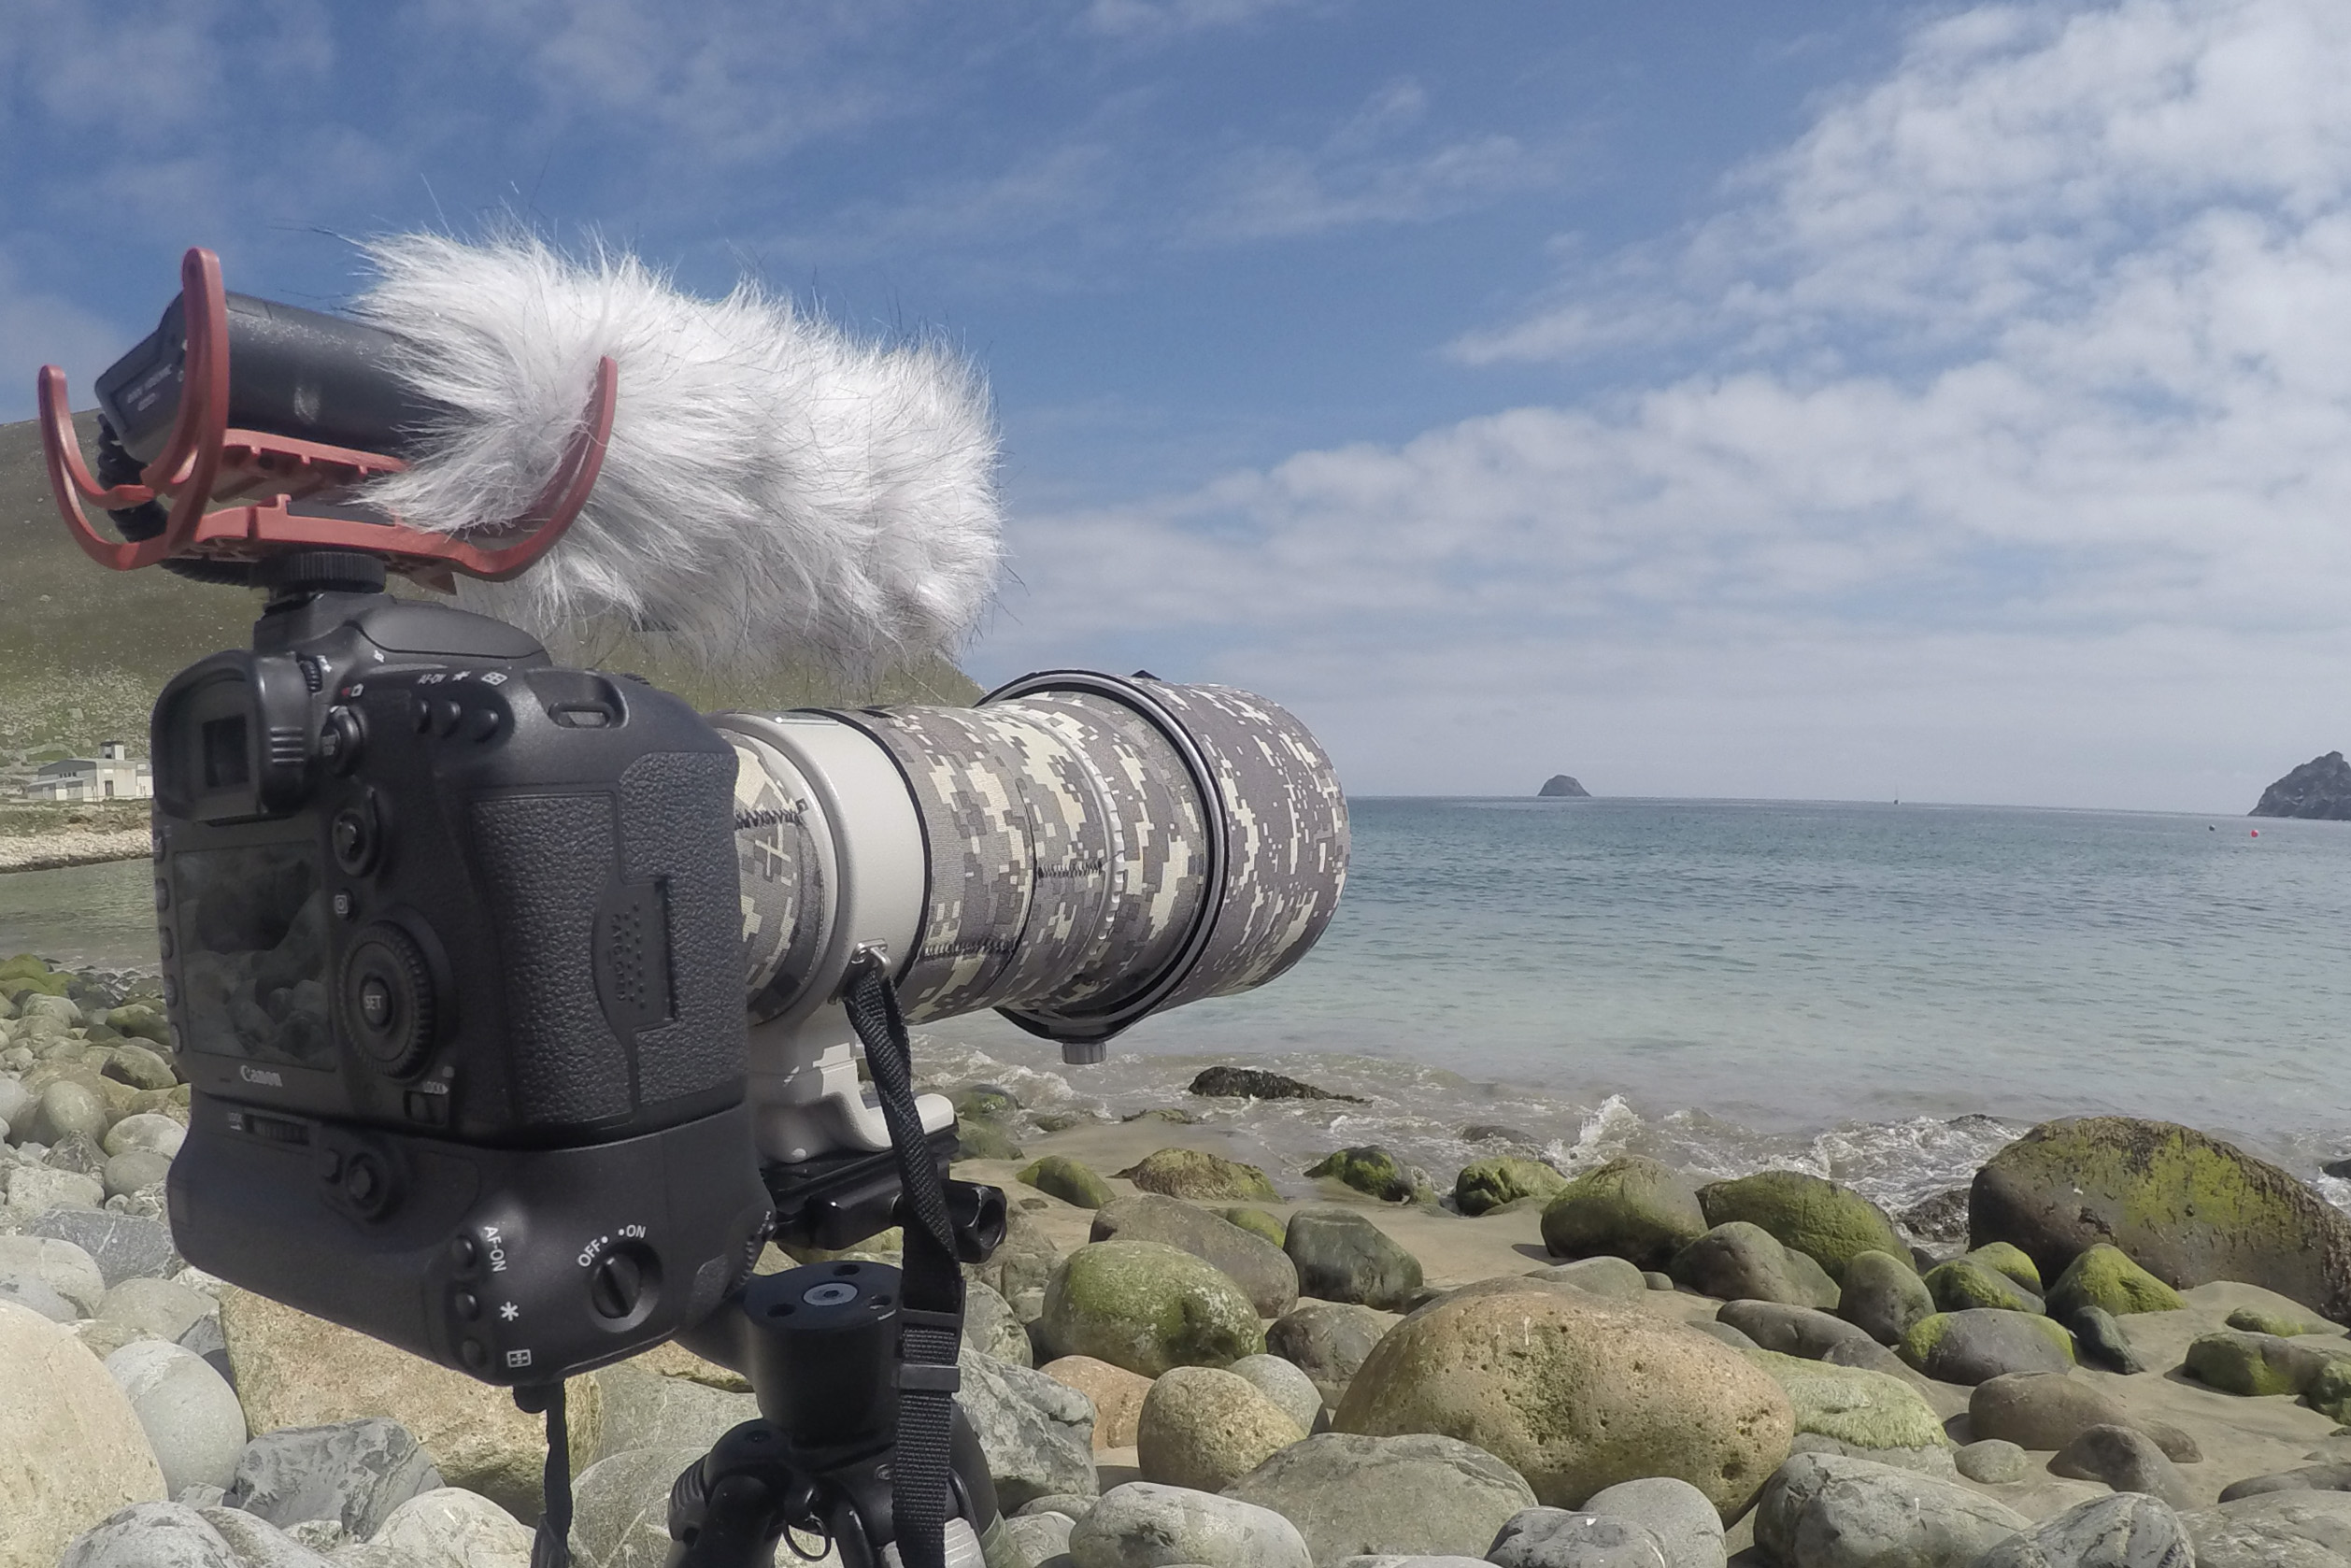
A tripod is a well-known essential piece of kit for any aspiring landscape or wildlife photographer. We’ve enjoyed our trusty Manfrottos for over ten years now. Within more recent years, we added a Manfrotto hide tripod (column clamp and levelling centre column) to our kit along with a gimbal-style head. The tripods have been reliable and are heavy, but we’ve not found them too cumbersome to carry about on a shoulder. The Wimberley gimbal-style head is fantastic. Until only a few years ago I personally used a ball-and-socket head. This was a good tripod head and suitable for the smaller lenses I was using at the time. However, it lacked the flexibility in movement that I wanted sometimes. I have not discovered any restrictions with the Wimberley head as yet and it feels unlikely that I will.
You may notice that all of the photographs of the Canon EOS 7D Mark II contain a battery grip. We cannot now imagine life without a battery grip. It’s a real comfort when you don’t need to think about replacing batteries all of the time. We keep them well-charged and never need to change them during a photography session.
The microphone you can see is Røde Videomic with a Røde deadcat. It is incredibly easy to use and produces good results.
Comments
We love to know your thoughts on our articles so greatly appreciate you taking the time to comment. We may be unable to reply directly but are in the process of creating a FAQs page to answer any questions. We currently check all comments before they’re posted so they do not appear immediately on the website.
Thank you for visiting www.embracenatureuk.com!
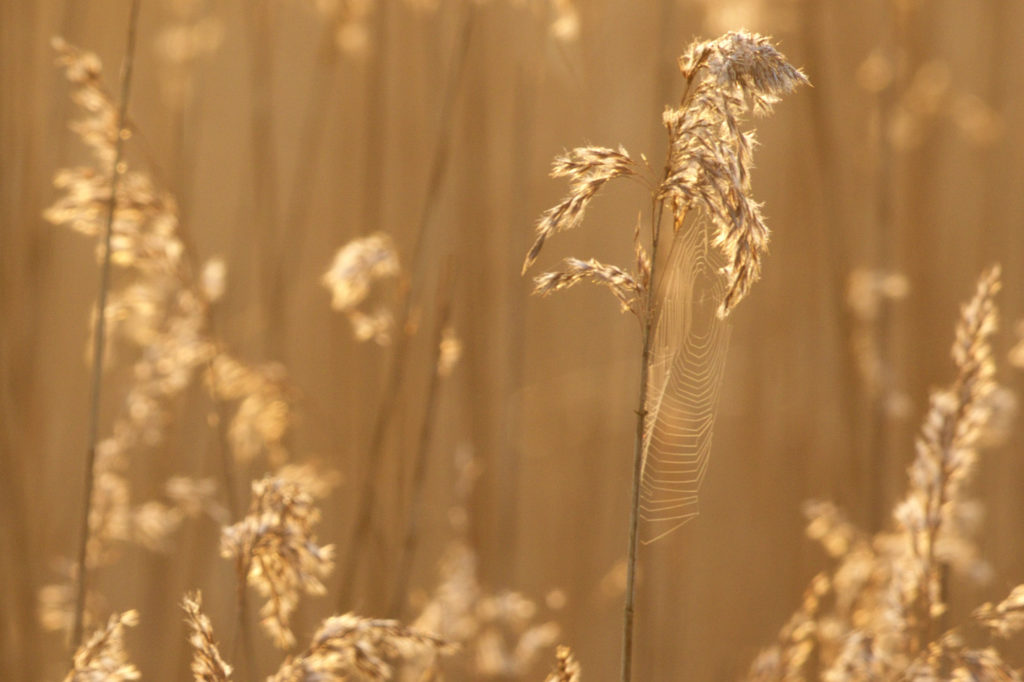
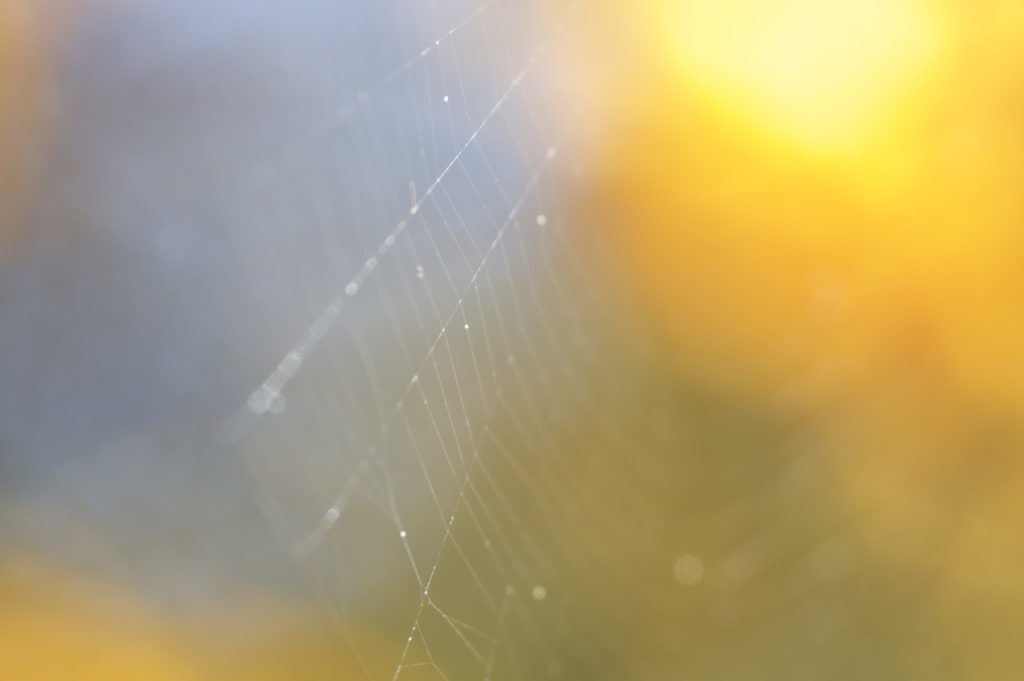
Spiders are a difficult subject to photograph. It doesn’t seem as if it should be that way as they are everywhere. This is what makes it so frustrating when trying to capture a good, or even remotely OK photograph of a spider. There they are, sat in the dark corner of your living room, doing something interesting in one of the most amazing creations by a creature – their web – and yet everything that a photographer hopes for when capturing an animal, is missing from this scenario.
The light is bad, the composition is bad, the background is dire, the web is dull, if you focus on the spider’s eyes, the legs are blurry, if you increase the aperture, the shutter speed is too low and the spider is still BLURRY. When you get it in focus to a reasonable degree, guess what?! The overall lighting and appearance of the scene is so terrible that the only rightful place for the image is in the trash.
This might be enough to put you off of spider photography for life, but fear not! There is a way to take good photographs of spiders but you have to be choosy.
Some photographers may move spiders to a location where they can safely control the lighting and the position of the spider, but this only suits one type of spider photography. If you want photos of spiders in their natural environment, exhibiting natural behaviour, you need to approach the subject differently.
We’ve put together these points to help you improve your spider photography and walk away smiling.
Choose a subject in the open
It may sound obvious but in order to avoid bad photos of a spider in a dark corner, you need to photograph a spider that isn’t in a dark corner. The lucky side of spider photography is that spiders really are everywhere. Look on and in walls, amongst gravel, on your lawn, in trees and there will likely be spiders. Greenery makes for a nice background and you may find a greater variety of species around the garden than you do in the house.
Lighting
This is immediately helped by going out of doors to photograph spiders. The time of day can influence how much light you have and sometimes you’ll find a sunny day brings out a lot more spiders, and therefore more options as well. Macro lenses immediately take light away from you, so the brighter it is outside, the better chance you have of getting a good balance between aperture and shutter speed. If your spider is stationary you might benefit from using a tripod so that the shutter speed will have little bearing on how well the shot turns out. This will allow you to use a smaller aperture (a larger ‘f’ number) and in turn have more of the spider focussed.
Hold your breath
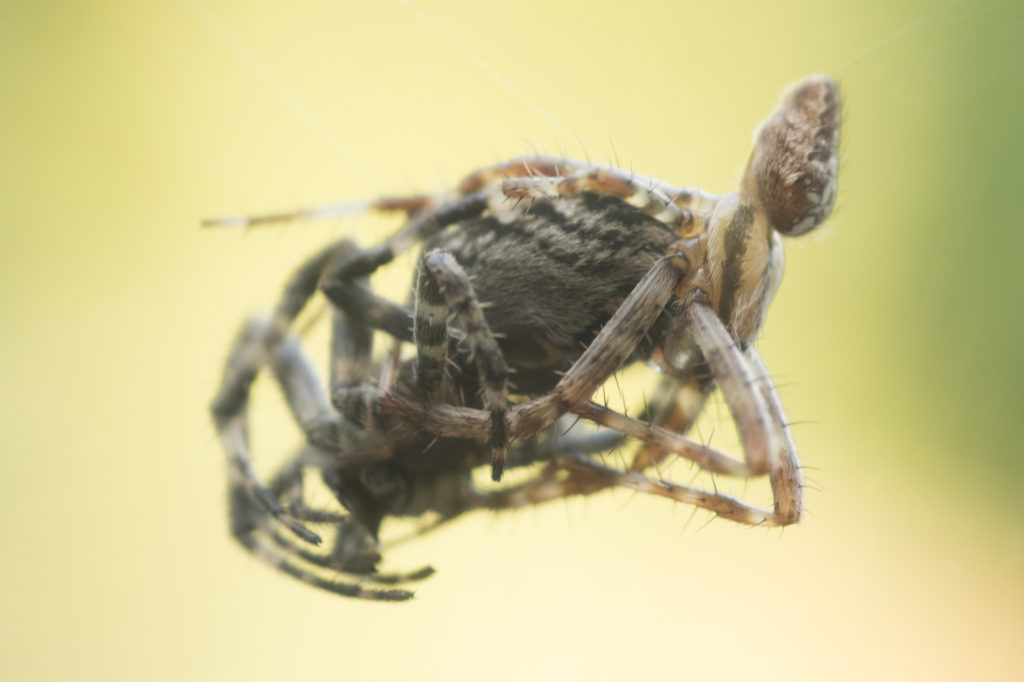
These two spiders were very active a few days ago in the Embrace Nature UK garden. The light was not on our side, nor was their location in which case getting them focussed or in good light at all was extremely difficult. The photos will not be winning awards but show the behaviour as we followed a few of our own suggestions to capture their activities. One of the ways we did this was by holding our breath whilst taking the photograph. As the spiders were moving continuously a tripod didn’t seem appropriate. There was one bit of bright green in the garden at that time so we had to crouch to get it in the background, then sway back and forth trying to get the spiders in focus. We were breathing hard at the end of it but holding our breath for the photograph stopped us from losing that fleeting focus that was essential to capturing these images.

Take your time
Rushing photographs can often lead to poor results. Many spiders will sit still and seem oblivious to your frantic attempts to capture a good image of them. Before the days of digital photography we had to rely on our eyes at the moment of taking the photograph to achieve the results we desired. Nowadays we have a ‘cheat-screen’. We can check how the light has turned out, we can zoom in and see if the subject is focussed and whether we have successfully composed the image. This new-found glimpse into the outcome of our work in the field is not to be underestimated. Check that the photographs you are taking are good, and if there is something you don’t like, tweak the settings until you get photos that you’re happy with. Spiders may have their difficulties as photographic subjects, but sitting still is maybe one of their real qualities. This will not always be the case but in many situations you will have the chance to take your time and criticise your images as you go; resulting in better over-all outcomes.
Jump for action
As with any animal, you need to expect the unexpected and be prepared for anything in order to get great shots. Keep your batteries charged and your camera accessible with plenty of free shots on your memory card as action can happen at anytime. Perhaps you pop into the garden to empty the bin and then see a beautiful spider wrapping another spider in its web. It’s easy to pass by and ignore this because it’s “just a spider”. It isn’t. Never underrate arachnids. They are as interesting and incredible as any other creature you might stumble across with your camera. I won’t pretend I don’t have a fear of some spiders but they fascinate me, and if you want good photographs of them, they should fascinate you too and make you want to share their beauty with the world in the form of your photography.
Sometimes you spend so long waiting for a good shot that when it finally arrives, you’re so excited that you can lose your composure and make silly mistakes. You can work around this to some degree by being so familiar with your equipment and shooting in a variety of conditions that your hands should act without you needing to think.
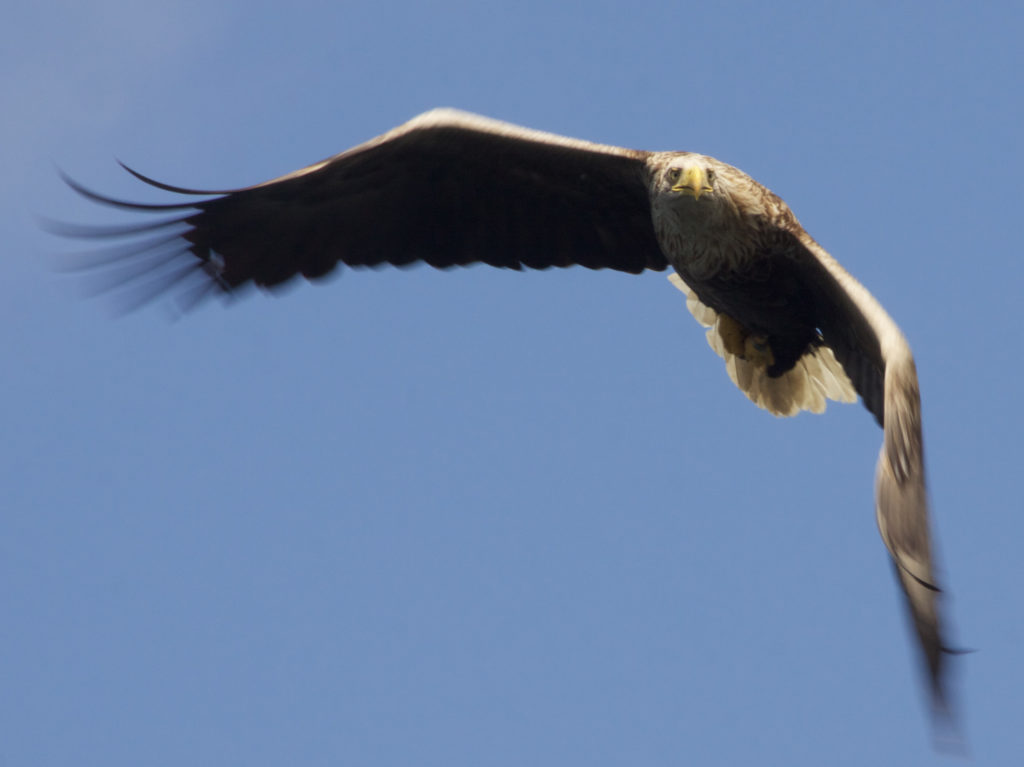
Some years ago we went to the Isle of Mull in Scotland to see White-Tailed Eagles. On this trip the boat-operator throws a fish into the water next to the boat, which usually attracts an Eagle to allow you a close encounter. I have always been of a polite demeanour, so whilst everyone else scrambled to the best positions, I found there was no space for me so I was left in the middle of the boat, standing on the seats, trying to get photographs. I hadn’t contemplated which settings would work best in this situation and was so overtaken by the awe of seeing a White-Tailed Eagle so close that the shots I came away with were nothing like I’d hoped for.
This has led me to consider the best-case scenario more before venturing out to take photographs. This way I can be prepared to take better images even when pleasantly surprised by a brilliant encounter.
There are still some experiences that catch us so unaware that there’s just nothing we can do to prepare for them. On a recent visit to St Kilda (again in Scotland), I carried the camera in my arms most of the time to ensure I would capture anything that popped up along the way. I did this continuously even though the camera is very heavy and St Kilda’s cliffs are extremely tall and steep, with one exception. I went to collect a trail cam one morning and as the walk to get there was fairly significant, I put the camera in my bag. What I didn’t know was that not far from the location of the trail cam was a group of rocks from which a huge bird would suddenly spring and fly off. The rangers hadn’t seen it for four days and we certainly didn’t anticipate seeing a Snowy Owl on a Scottish island. My immediate reaction was to grab at my bag and rush for the camera but the Snowy Owl was faster and all I got was some very distant shots.
A week later on South Uist, I had a close encounter with a Short-Eared Owl whilst taking the recycling to the local collection bin. This was the first time I didn’t have the camera on me whilst on South Uist.
It’s safe to say that you should always expect the unexpected, prepare for the best-case scenario and make sure your camera is fully prepped and on the correct settings before going out to take wildlife photographs. I always keep spare batteries and memory cards in my pocket rather than in my bag as in those moments where the experience is so unique and exciting, even a thousand images can be used quickly and you can never trust equipment not to play tricks on you at the worst possible time.
I have heard Wildlife Photographers previously say that you should be able to operate the camera with your eyes closed and I couldn’t agree with this more. It’s vital that you know your way around the camera extremely well for if the light suddenly changes or something that was stationary begins to move. This is where your user guide becomes priceless and regular use of your camera is a necessity – so when it comes to capturing the unexpected, you can be as composed and prepared as is humanly possible and enjoy that moment at the time AND in retrospect.
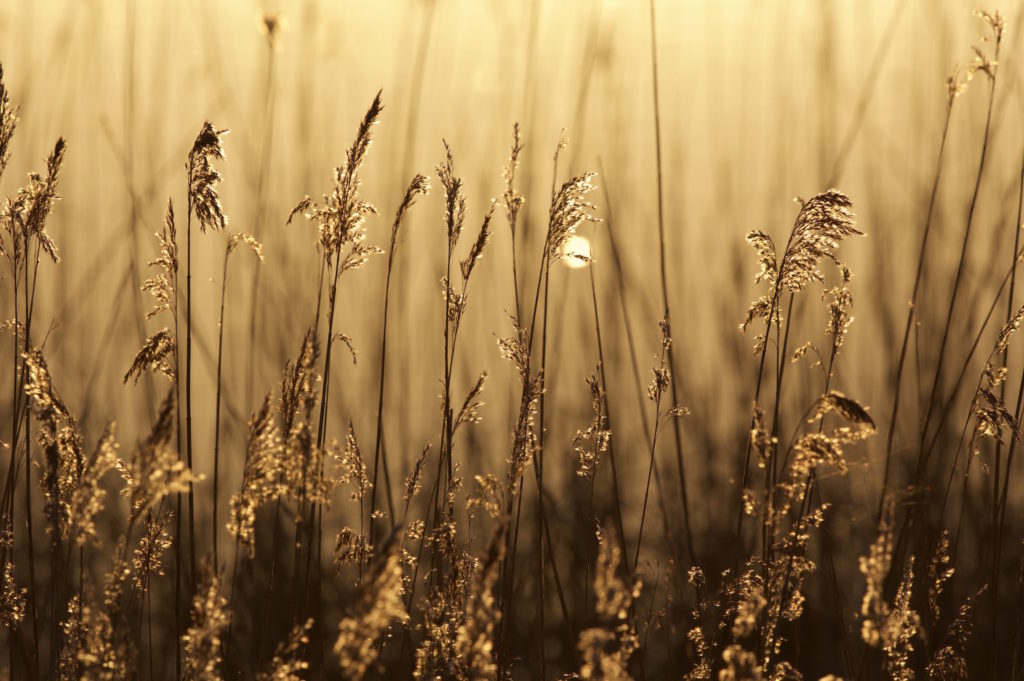
Something that is often considered one of the hardest parts of being a Wildlife Photographer is the early mornings. For me this is actually one of the more enjoyable aspects. There is something about being awake before most other people and catching the sunrise that feels a bit special. The earlier you’re out and about, the more active wildlife is and the better the light is. There is always the risk that the weather doesn’t obey the forecast and actually your beautiful sunrise is sat behind a wall of cloud; but when your morning goes to plan, it really pays off!
Knowing the right time to do photography is essential to getting really good photographs. The light is one of the key features that influences how well your photographs will turn out. Many of us have probably experienced days when the light is so bad that every single photograph you take is poor. Unless you can find enjoyment regardless, these days turn out to be a big waste of time. Instead a little bit of research can go a long way.
I regularly use ‘The Photographer’s Ephemeris’, which is an app available on the internet that tells you sunrise, moonrise, sunset and moonset times as well as the direction that the sun or moon are in at each time. Combining this with the weather forecast is priceless.
It is also important to know your subject and what sort of photograph you’re going for. You might prefer harsh daylight if you’re photographing buildings and want strong shadows. If you’re photographing most animals, they are probably more active in the early morning or late evening but you still want to allow enough time to catch the ‘golden hour’ when the light is at it best. You definitely do not want to be setting up your camera when the sun is already up or, for the evening, when it is hitting the horizon. Keep in mind as well that how long you have of the golden light depends on where you’re stood. If the sun is going to disappear behind a hill, casting you in shadow before sunset, you want to know that you’re there early enough to catch the last of the sun’s rays.
There is enormous satisfaction in getting it right and instead of looking at every photo and pressing delete, you are more likely to have a lot more useable shots and much more fun when taking your photographs.